
Practical guide · Feeding
How to introduce an automatic cat feeder
Help your cat accept a new automatic feeder through familiar food, gradual sound exposure and supervised meals. Check actual intake, timing and a reliable fallback.
The short answer
Build acceptance before relying on the timer
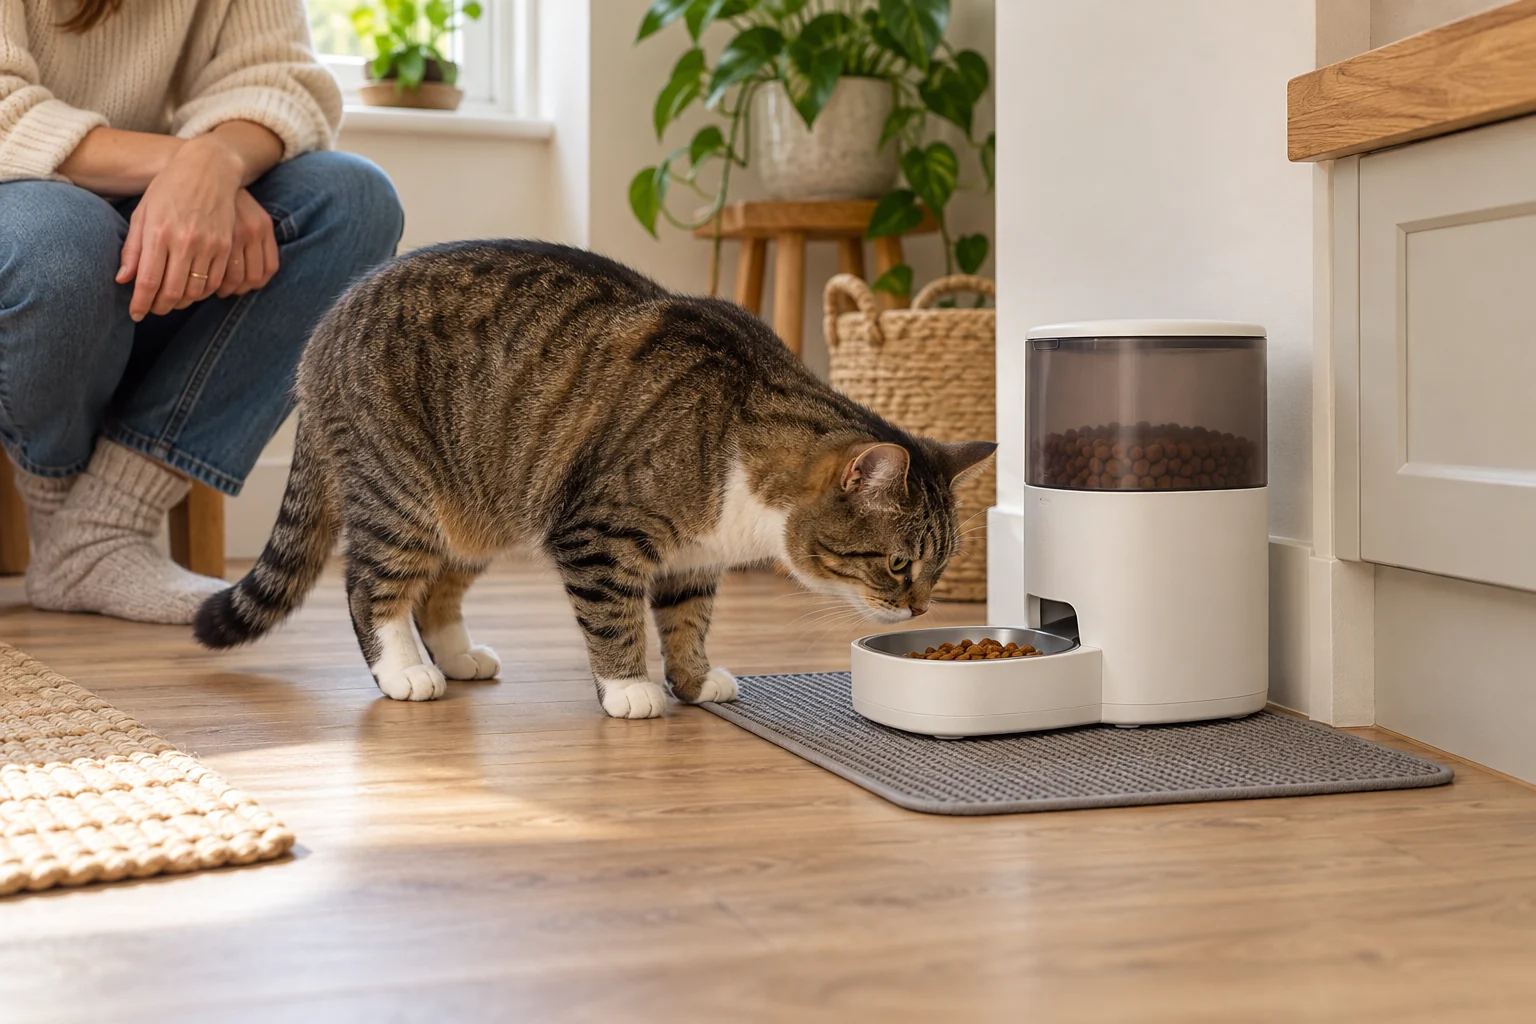
Let the cat explore the feeder without a surprise movement first, then offer familiar food from its normal bowl position. Introduce the operating sound at a comfortable distance and progress to supervised scheduled meals only when the cat returns willingly. Confirm that the correct cat actually eats the measured portion; an opening or app notification alone does not establish that.
An automatic feeder introduces more than a different bowl. There may be a new surface under the paws, a taller edge, a lid above the face, a motor sound and food appearing when a person is absent. Introducing those changes together can make it hard to tell which one worries the cat.
Keep the familiar food and normal daily amount while the equipment becomes familiar. This is a setup and acceptance routine; our dry-food feeder comparison and wet-food feeder guide explain which mechanism suits the meal.
Choose one change at a time
Write down the current meal times, food type, usual portion and where the cat chooses to stand. Note whether another pet approaches or takes leftovers. That simple baseline helps separate a feeder problem from a location, diet or household-access problem.
Choose a quiet, accessible position away from litter and separate from drinking water. Keep the floor steady and the approach open. Do not place a hopper on a narrow shelf to stop another cat reaching it: a jump, moving machine and exposed food are a poor combination for initial practice.
If your cat has a veterinary feeding plan, agree how the device will fit it before changing the routine. A new feeder does not determine calorie needs, medicine timing or how long a particular food can remain out.
Prepare the equipment before involving the cat
Read the exact model instructions, remove packaging and wash permitted food-contact parts. Dry them fully and assemble the device correctly. Set the clock, power source and intended schedule away from the cat’s feeding place so button sounds and accidental openings do not interrupt a meal.
Run the permitted test cycle without the cat beside the moving parts. Check that the lid clears the bowl, the tray aligns and the feeder remains steady. For a dry hopper, confirm the permitted kibble format and weigh several test deliveries; a displayed portion is not automatically a particular number of grams.
Store test food appropriately and keep the total offered to the cat consistent with its normal amount. Avoid topping up every practice attempt with an extra full meal, especially when several household members are helping.
Start with a familiar eating experience
Allow the cat to investigate without being lifted or pushed towards the device. Where the manufacturer permits a non-operating familiarisation stage, begin there. A familiar clean bowl or the supplied removable bowl near the intended position can make the first step easier, provided it is stable and used as designed.
Offer the usual food and step back. Look for a relaxed approach, eating and the ability to leave normally. A cat crouching away from the bowl, repeatedly retreating or watching a lid instead of eating needs a smaller change, rather than a more tempting pile of treats.
Do not hold the cat in place, guide their head through an opening or make access to all food depend on overcoming fear. Return to a familiar arrangement if a normal meal is being missed. Ask your vet about reduced intake or other signs of illness.
Introduce sound and movement gradually
Let the cat hear one normal operating cycle from a distance where they remain comfortable. Use only the controls and test modes intended for the model. Keep fingers, paws and loose bedding clear of moving parts, and do not disable sensors or tape down safety mechanisms.
After the sound, allow voluntary investigation of the newly accessible food. If the cat eats normally, repeat a similarly easy experience before making it harder. If they flee or refuse the meal, increase distance or return to an earlier quiet stage.
Sound sensitivity can vary with the room. A feeder on a resonant cupboard, against a skirting board or on an uneven tile may seem louder than it did on the worktop. Resolve position and stability while following the maker’s ventilation and clearance instructions.
A pre-portioned tray example: Cat Mate C500
For several meals
Cat Mate C500 five-meal feeder
A rotating tray with one compartment open initially and four scheduled openings. A sensible starting point when you want several pre-portioned meals without an app.
Check: Ice packs require preparation
View on Amazon ↗The C500 exposes portions you place in its carousel. Its numbered compartments and clock require a different setup from a hopper that releases measured dry food. The manufacturer’s C500 instructions recommend checking operation with your cat while you are present.
Set the actual clock correctly, including the 12- or 24-hour format, and check which programmed opening comes next. Do not assume a time entered for tomorrow will skip an earlier occurrence today. Keep the food below the level where it could foul the rotating lid.
Ice packs affect the practical loading routine but do not refrigerate the food. Follow food-storage guidance and the feeder instructions. Supervised acceptance of one meal does not establish that a loaded tray will be appropriate for every room temperature or absence.
A dry hopper example: Cat Mate C3000
Local battery controls
Cat Mate C3000 dry-food feeder
A battery-powered hopper feeder with local LCD controls and up to three individually sized timed meals a day. It is a straightforward choice when you want dry-food dispensing without an app.
Check: Kibble output needs checking with your actual food
View on Amazon ↗A hopper adds a delivery sound and a changing quantity of kibble in the bowl. Introduce the eating place first, then observe deliveries while you are at home. Measure what arrives rather than judging the amount from the size of the pile.
Check the outlet after a delivery and confirm the cat can eat without leaning awkwardly into the machine. A hesitant approach can reflect bowl shape or height as well as the motor. Keep a usable alternative available while you work out the cause.
For owners choosing physical controls over apps, the feeder guide without Wi-Fi compares the setup implications. A locally controlled machine still needs power checks, cleaning and a human fallback.
Use behaviour to decide the next step
| Stage | Useful sign | If it is difficult |
|---|---|---|
| Exploring | Approaches and leaves freely | Increase space and remove pressure |
| Familiar food | Eats a normal measured meal | Return to the familiar bowl arrangement |
| Operating sound | Stays or returns calmly | Add distance and repeat an easier stage |
| Scheduled meal | Correct opening and actual eating | Check clock, access, alignment and portions |
| Everyday use | Consistent intake and reliable operation | Keep supervision and solve the missed step |
There is no need to complete a stage on a particular day. A few unremarkable meals are a better foundation than a dramatic first encounter.
Check who actually eats
In a multi-cat home, observe more than the first approach. Another cat may wait nearby, block the route or arrive as soon as the lid opens. The intended cat can appear interested while losing the meal after you leave.
Offer separate feeding positions with comfortable escape routes. If diets must remain different, compare timed and microchip feeders and discuss the overall arrangement with your vet. Identity access and scheduled release are separate features.
Make the everyday routine easy to hand over
Leave a short note explaining the model, food, normal amount, clock setting, cleaning method and what to do if a meal does not appear. Show the helper how to confirm actual eating and provide the fallback meal without adding an unintended second ration.
After washing or changing batteries, recheck the schedule and observe the next cycle. Keep the automatic-feeder cleaning routine with the setup notes, so familiarity and food hygiene remain part of the same manageable habit.
Check readiness before relying on the schedule
Automatic feeder introduction checklist
0 of 5 checks complete.
Frequently asked questions
How long does it take a cat to accept an automatic feeder?
There is no useful fixed deadline. Some cats approach straight away; others need several short, uneventful sessions. Progress when your cat eats comfortably and returns after the mechanism operates. Keep another reliable way to serve the normal meal rather than trying to hurry acceptance through hunger.
Should I remove the old bowl immediately?
Keep a familiar feeding option while introducing the device, accounting for all food offered within the daily amount. Change the location, bowl and operating sound in manageable stages. If the feeder has a manufacturer training mode, use its exact instructions rather than wedging a lid open.
Can I leave my cat alone with the feeder on the first day?
First supervise its operation through representative meals, checking timing, portions, access and actual eating. Plan a person who can check the cat and deal with a missed or jammed meal when you are away. The number of compartments or hopper capacity is not a safe absence duration.
What if the motor sound frightens my cat?
Stop advancing the exercise. Offer a calm familiar meal and restart with more distance and less novelty, without forcing the cat near a moving mechanism. Persistent avoidance or a change in appetite deserves attention; speak to your vet if your cat is eating less or seems unwell.
Will a timed feeder keep the other cat out?
Most ordinary timed lids, carousels and hoppers provide no identity check. Once food is exposed, another pet may reach it. Separate feeding places may help, while selective-access equipment addresses a different task. Check the exact design rather than expecting a clock to prevent food stealing.