
Practical guide · Cat carriers & travel
How to clean a cat carrier
Clean a rigid carrier’s shell, door, seams and liner without leaving residue. Separate routine washing from veterinary infection-control advice and check reassembly.
The short answer
Clean, rinse, dry and check the complete assembly
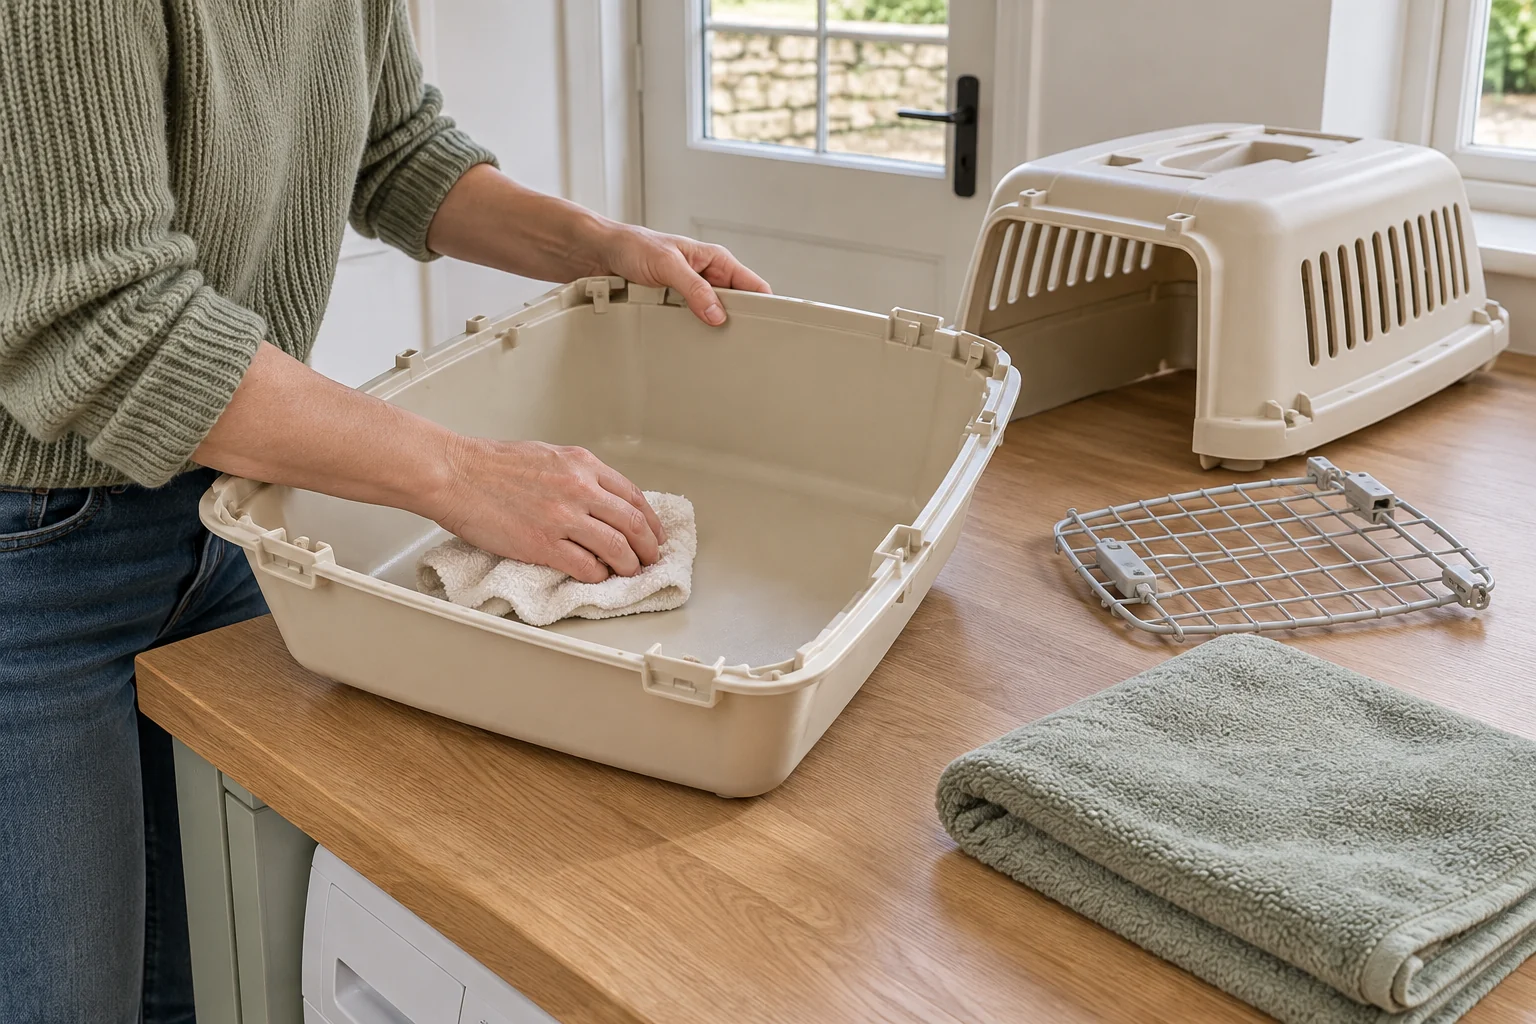
For routine care of a suitable rigid carrier, remove the liner and permitted detachable parts, clear debris, then wash the shell and door using the maker-approved method. Cats Protection recommends mild non-toxic soap and water, followed by rinsing and drying. Clean the bedding by its own label, dry all parts fully and check every fastening during reassembly. Infection-control advice needs a separate veterinary plan.
A carrier needs to be clean enough for the next journey and sound enough to carry the cat securely. Those tasks go together: cleaning exposes seams, latches and small corners that are easy to overlook during hurried loading.
This guide concentrates on suitable rigid plastic carriers with removable bedding. Soft bags, fabric panels and electronic accessories need their own labels and instructions. For everyday acceptance after cleaning, use the carrier introduction guide.
Identify the parts and instructions first
Find the exact model and the maker’s cleaning and disassembly guidance. Check which parts may be removed and how they must be reattached. A removable upper shell, dedicated top hatch and front door are different components with different fastenings.
Keep a photograph of the assembled carrier and its connections if that helps with reassembly. Set out a clean area for the door, clips and other permitted detachable pieces. Keep small hardware away from children and pets.
Do not dismantle a stressed or loaded carrier around the cat. Move the cat to a separate suitable place first. If a latch is already broken or a shell is cracked, resolve the structural problem rather than treating a wash as preparation for another journey.
Remove bedding and clear debris
Take out liners, cushions, food bowls and other accessories. Follow each item’s instructions, especially where a bowl clips into the door or a cushion contains an insert. Keep the cleaning method for each part separate in your plan.
Remove loose hair and debris carefully. Deal with solid soiling before washing, using appropriate household hygiene and keeping the cat out of the cleaning area. Avoid brushing dirt into vents or pushing it into latch mechanisms.
Inspect the base and corners in good light. A thin film or material caught in a seam can remain even when the centre looks clean. Do not use sharp tools that might damage the shell while scraping a difficult patch.
Wash suitable rigid surfaces thoroughly
Cats Protection’s carrier advice recommends mild non-toxic soap and water, followed by rinsing and drying. Apply the carrier maker’s own restrictions alongside that general routine.
Use a suitable cloth or brush to reach corners and grooves without damaging them. Clean the underside of the base, inner walls and accessible edges, rather than wiping only the obvious floor area. Keep vents open and remove residue from permitted removable parts.
Do not assume that hotter water, steam, a dishwasher or a pressure washer is an improvement. Those methods may affect clips, seals, metal parts or the shell, and need specific permission for the exact model. A careful supported method is more useful than an aggressive improvised one.
Clean the door and fastenings
Work around the grid, hinges, latch sockets and shell connections as their design allows. Remove dirt without forcing moving parts. If a fastening no longer returns or locks correctly, consult the maker rather than adding an unapproved lubricant or substitute clip.
Check the whole door perimeter for damage or sharp points. A clean door still needs to fit and close correctly. Do not bend a grid or modify a latch to compensate for a distorted shell.
Keep model-specific parts together. A door or clip from another size may look similar while fitting differently. Replacement compatibility matters here just as it does with the carrier’s handle and shell fastenings.
An opening-layout example: Catit Cabrio
The Catit Cabrio provides top and front access and a removable food-and-water tray. Those features create additional surfaces and attachment points to inspect during cleaning. Confirm the supplied instructions before removing or washing any part.
Wide-opening carrier
Catit Cabrio carrier, turquoise
A rigid carrier with a wide-opening upper section and front access, designed to make the inside easier to reach. It can remain open at home as a familiar resting space between visits.
Check: Outer dimensions do not establish inside fit
View on Amazon ↗Its 51 × 33 × 35 cm dimensions describe the outside, not the usable inside floor. Do not add thick replacement bedding after cleaning without rechecking fit. The carrier measuring guide explains how liners and curved roofs affect room.
This is an example of checking the actual layout, not a claim that the model can use every cleaning chemical or appliance. A feature described as removable still needs its own care instructions.
A removable-shell example: Ferplast Atlas 30
The Atlas 30 is a front-opening carrier with an upper shell that can be removed. Separating the shell as instructed can make the inside easier to reach, but it creates a final reassembly task that must be completed before carrying.
Larger front-entry box
Ferplast Atlas 30 carrier, black
A front-entry rigid carrier with a 60 × 40 × 38 cm exterior and listed maximum load of 15 kg. Body room and doorway fit still need measuring.
Check: No top-opening hatch
View on Amazon ↗Check the door seating, shell connections and handle after cleaning. The removable roof is not the same as a dedicated top hatch that can be used during normal handling. Keep spare parts specific to the exact model and size.
If the existing carrier fits and remains sound, a new purchase is not necessary simply to follow this guide. The product examples help identify the parts to inspect and the questions to ask about care.
Rinse and dry before reassembly
Rinse permitted washed surfaces thoroughly so no cleaning residue remains. Inspect corners and moving parts where water or foam can collect. Dry in a suitable ventilated place away from conditions the maker warns against.
Let the liner dry completely according to its label. Thick seams or filling can remain damp after the surface feels dry. Do not close a wet carrier with damp bedding inside and expect it to become ready while stored.
Once dry, check the surface and all components again. Look for damage revealed during washing, missing fasteners or a clip left beside the sink. A tidy exterior does not establish that the assembly is complete.
Separate routine cleaning from infection control
If a vet has identified an infectious condition or given a specific contamination concern, ask for a suitable cleaning and disinfection plan. The organism, product concentration, contact time and material compatibility can all matter.
Do not publish or follow a universal bleach or disinfectant recipe for every carrier. Check whether the recommended process is safe for the exact material and how residue must be removed. Keep the cat away until the equipment is ready according to that advice.
If a damaged or absorbent component cannot be cleaned appropriately, ask whether it needs replacing. Strong fragrance does not establish hygiene, and an antibacterial label does not answer every infection-control question.
Return a sound carrier to its normal place
Reassemble in the specified order and check every required fastening. Confirm that the door closes and locks, the shell sits correctly and the handle is sound. Keep the carrier empty during these checks rather than testing it by lifting the cat.
Add suitable clean dry bedding that does not bunch against the door or obstruct vents. Put the carrier in its calm familiar location and allow voluntary exploration. Avoid washing every familiar resting item at once when a separate clean option can remain available.
If the cat is reluctant after a difficult trip, return to easy open-carrier practice. A clean carrier and a calm introduction support each other, but neither should delay veterinary care that is needed now.
Check before the next journey
Carrier cleaning and reassembly checklist
0 of 5 checks complete.
Keep the instructions and a suitable spare liner together. A repeatable cleaning routine is easier to manage than discovering damp bedding or a missing clip at the moment you need to leave.
If washing reveals damage, use the replacement decision guide. A sound carrier with one damaged removable part may have a supported repair route, explained in door and clip compatibility.
Frequently asked questions
Can I clean a cat carrier with disinfectant?
Do not choose a disinfectant solely because it says antibacterial. It must suit the carrier material, the contamination and use around cats, with the correct dilution, contact time and rinsing. Ask your veterinary team when infection control is needed and check the carrier maker’s compatibility guidance.
Can I put a plastic carrier in the dishwasher?
Only if the manufacturer explicitly permits it for the exact parts. Plastic construction alone is not permission, and doors, clips, inserts and liners may have different restrictions. This guide uses hand-cleaning as the general routine for suitable rigid carriers.
Should I wash the liner with the carrier shell?
Treat it separately. Follow the liner’s own washing and drying label and keep any non-washable insert out of the wash. A removable cushion does not automatically share the shell’s cleaning method, and thick bedding must dry fully before it goes back inside.
How often should I clean the carrier?
Inspect before and after each journey and clean promptly after soiling. A carrier kept out as a familiar resting place also needs routine attention according to use. The exact depth of cleaning depends on dirt and contamination, not a fixed calendar that applies to every trip.
Why does my cat avoid the carrier after cleaning?
A strong new scent, damp liner, changed bedding or a difficult recent journey may affect the response. Return a clean fully dry carrier to a calm familiar place and rebuild voluntary use. Do not leave soiling in place to preserve scent or force the cat inside to overcome avoidance.